Cutting Files · Tutorial · Uncategorized

Birthday Candles Card

Hi everyone! Thank you for reading this post. Today, I’m going to share with you a design I made over the past couple of days. I don’t claim to have created this idea. I saw this previously on Pinterest, I think, and it just stuck with me.

Before I get into the tutorial, I’d like to clarify that I am from Australia and use metric measurements. The completed size of this card is A6 – 148mm x 105mm.

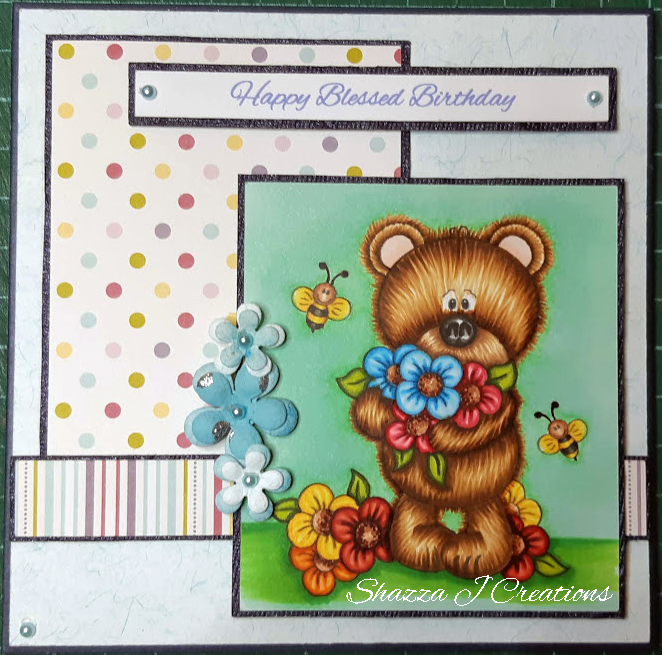
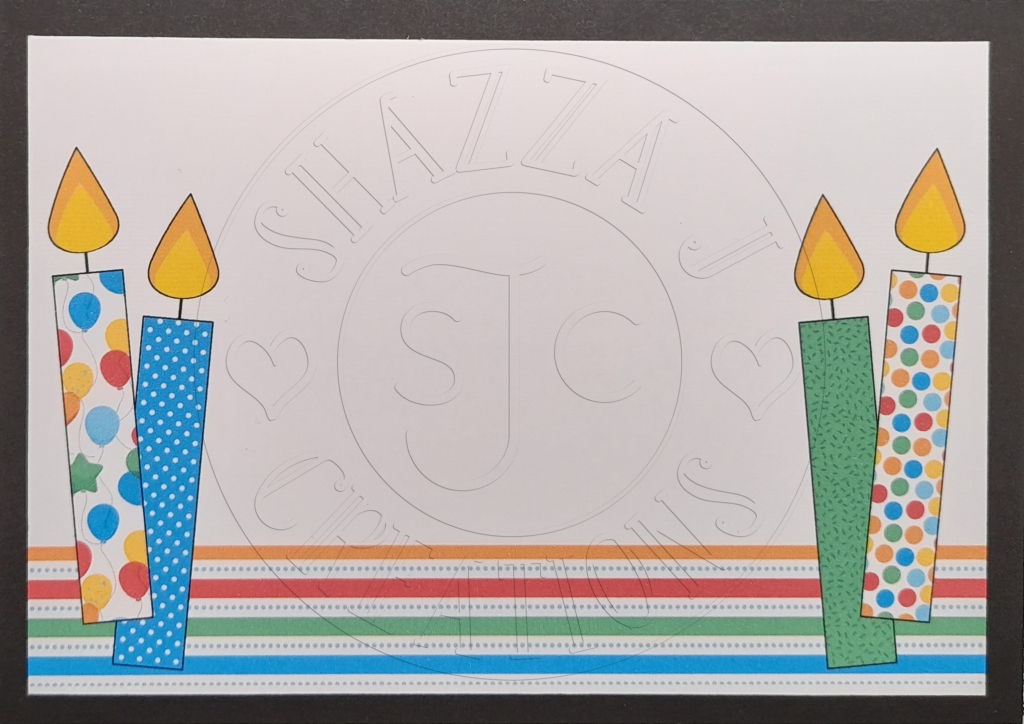
So this is the card that we’re going to make:

Completed Candle Birthday Card

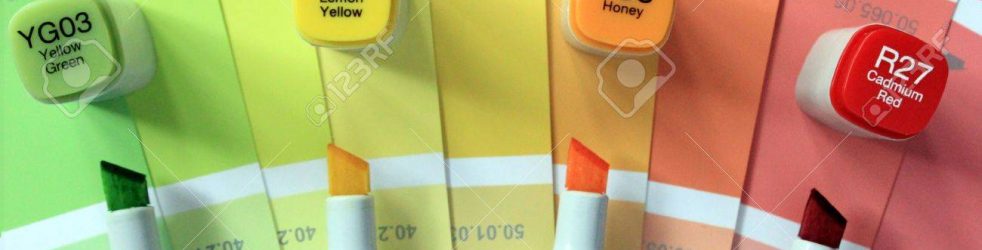
Step 1 – Choose some matching papers

For this particular project, I used 5 different patterned papers for the candles. I also used orange and yellow cardstock for the flames.

Step 2 – Create a cut file for your machine

I’m using a Brother Scan N Cut CM900, so Canvas Workspace users can skip this step as I have already provided you with the cutting file that is in the .cwprj format.

If you are using other software e.g. Cricut Design Space, you will need to use the SVG files and import them into your software. I am still trying to learn how to predetermine the size of an SVG, so hopefully posts in the future won’t have this step.

For the SVG option, resize each component of the SVG according to the following measurements:

SVG ComponentWidth (in mm)Height (in mm)
Candle Base1050
Large Candle Flame1015
Small Candle Flame810
Happy Script48.225
Happy Script Offset51.228
Birthday Script64.225
Birthday Script Offset67.228
Measurements of elements on the card

Step 3 – Cut out all the pieces

Use your electronic cutting machine to cut the pieces required. I used 5 different patterned papers for the candle base, orange and yellow card stock for the flame, ivory card stock for the background to contrast with the black card base.

For the sentiment, I used gold foil card for the script layer and black card stock for the offset.

You could also use just the one patterned paper or even cardstock. There are a gazillion variations – embossing the background or candles, making a portrait card, etc.

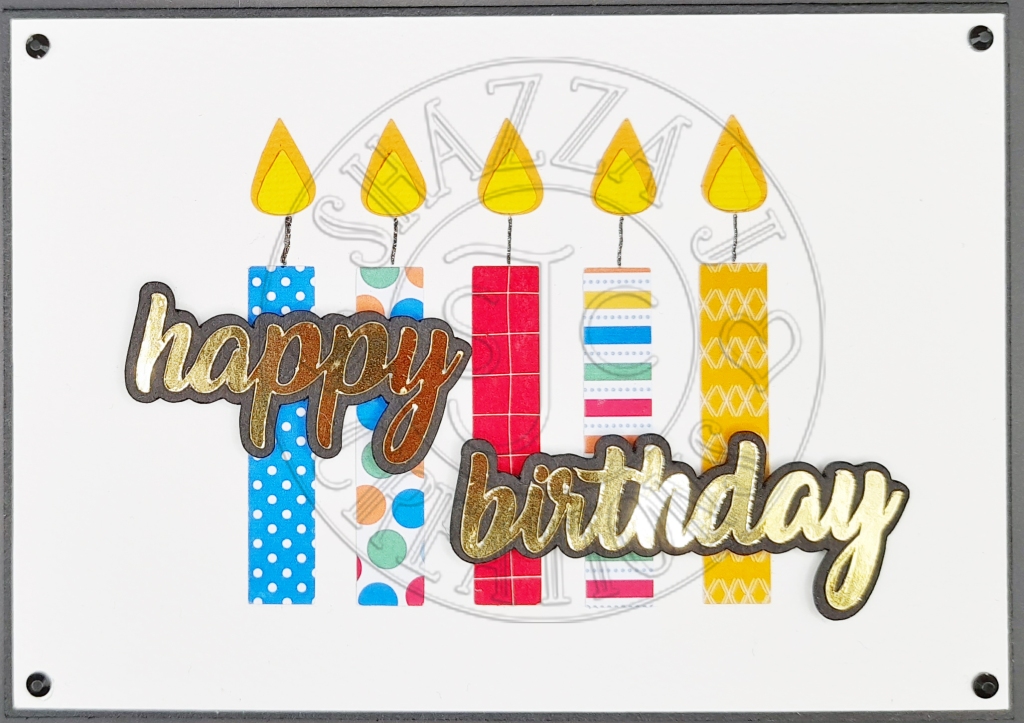
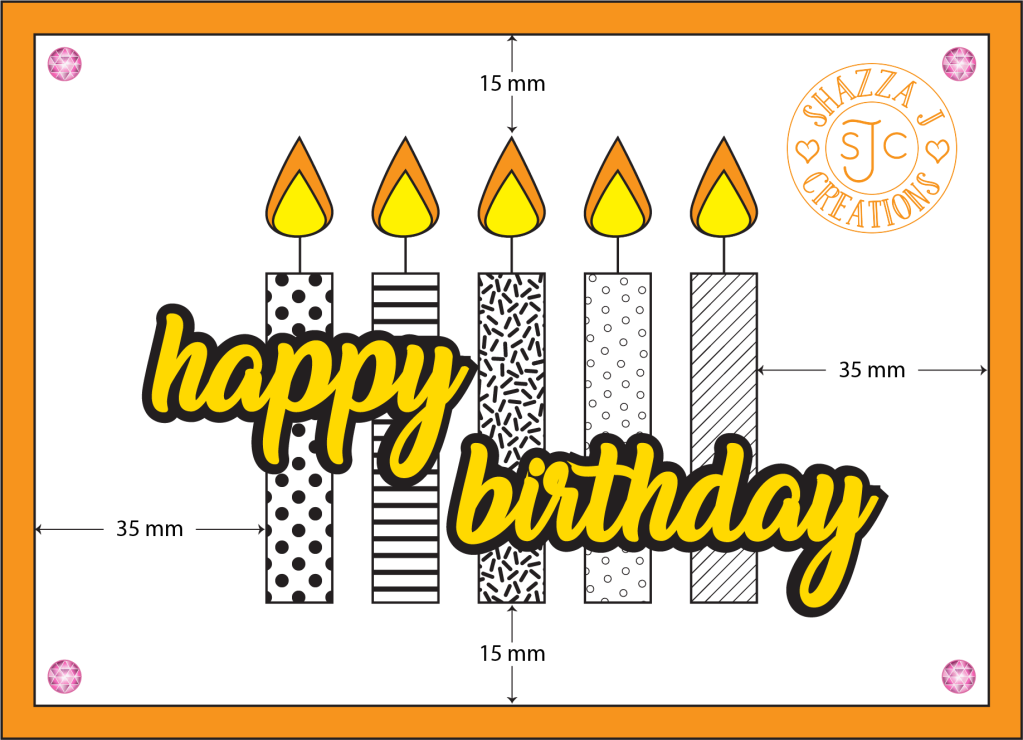
Step 4 – Assembly time

Here is the sketch with measurements.

Sketch used to make this card

Assemble the pieces. Stick the smaller flame at the base of the larger flame. Paste the script sentiment onto its corresponding mat layer. I stuck the patterned papers directly on the ivory card stock. For the sentiment, I used 5mm x 2mm foam squares to give the project some dimension.

Finally, add a gem on the 4 corners to bring everything together.

Step 5 – Add the insert

Insert Created to Coordinate with the Front of the Card

Cut out the insert from the printable and paste it on the inside of the card.

And We’re Done!

I feel like this card is a great one for batch making!

Files to download

I’m still learning how to share SVGs I have created. For some reason, I am unable to add them on here. As such, you can find the files here but only for the next 7 days! If you have any trouble at all with the files, please contact me and let me know.

If you try this out, please let me know how you went and share your project here. I look forward to hearing from you and I hope you enjoy this tutorial and the attached files.

Until the next time – Stay Safe!

Blog

Happy New Year!

Another new year. What better time is there to take time to make and embrace changes?

My Goals for the Year – May be Regularly Updated

  • Blog at least once a week.
  • Make time to work on projects.
  • Make at least 1 card a week.
  • Start entering cards into competitions again.
  • Be open to search for and receive help and support.
  • Create a website.
  • Create an online store.

I would also like to apologize for neglecting this blog. Thank you for staying with me and I look forward to creating and providing you with quality content. I’m still working on my photography skills, so please be patient with me ๐Ÿ™‚

Thank you for reading this post! Are there any changes you are going to implement in your life? Feel free to share your thoughts in the comments section.

Have a wonderful evening!

Uncategorized

I am extremely excited!

After winning a challenge on The Outlawz, I was asked if I’d like to be the guest designer for the month of July. I was gobsmacked cos I wanted that bad. Needless to say, I said that I would be honoured to be a guest designer for the Twisted Thursdays challenges that run for the month of July. The post went live today!! Woohoo! So now I get to share my creation with everyone.

The sponsor for the month of July for the Twisted Thursdays challenges over at the Outlawz is Leigh SB Designs and I loved creating with the image I was given to work with. I had ideas abound, but didn’t make many others.

This is my card which I cheesily called “Purr-fect Birthday”. I hope you like it as much as I had fun creating it!

That’s all from me at the moment! Crossing fingers that I’ll be able to get more creative inspiration!

Have a good one!

Uncategorized

Bon Appรฉtit

On the Sunday of my first weekend back in Singapore (the 28th of April), my younger brother from another mother invited my auntie, uncle, cousins and me to what he called “A Stout Brunch” at his home. He explained that it was like a champagne brunch but with stout instead. He’s a chef from high places so I wasn’t going to argue! I had spent the evening before with his older brother sipping on flavoured margaritas till the early hours of the morning. Because I was drinking the night before, I skipped my usual evening medication and consequently, I was a tad worse for wear that morning in terms of pain. However, there was no way in God’s once green, now polluted earth that I was going to cancel brunch. I did think that it might end up being a short catch up though.

Brunch was amazing with bacon, eggs, baked beans, toast and the tomatoes which somehow sneakily traveled to my other mother’s plate. Sneaky buggers, those tomatoes! There was much love and laughter with amazing people whom I hadn’t met for 7 long years. And it was great meeting his partner and kids whom I’ve never met. Even told his partner that if he did anything dumb, it could partly be my fault cos when he was much younger, his brother and I accidentally dropped him on his head! Oops!

My uncle and auntie kept checking if I was ok but I am so grateful that the pain remained manageable for longer than I expected. Maybe the Pina Colada and some “refreshing” Midori and lime concoctions helped! We were even entertained by an impromptu concert put on by his kids. I was grinning so much my cheeks hurt. It reminded me of all the times my cousins and I performed for the family at various family events when we were kids, trying to “extort” money from the adults to fund an expedition for the cousins.

The party may have lasted for a whole 7 hours, but the memories and the feelings of love, togetherness and fellowship will stay with me for a long time, if not forever. Ironically, Facebook reminded him that we were out together exactly 10 years to the date too!

This card is a tad late, but I think it’s never too late to thank someone when they have done something so sweet and created such amazing memories.

Image: From Cute Digi Bundle by Lee Holland Art

I would like to submit this card for the following challenges:

Outlawz Twisted ThursdayMay 23 – June 5 – Anything Goes

Outlawz Festive FridayMay 31 – June 13 – Anything Goes

Crafty CatzChallenge #464 – Anything Goes

Colour Crazy ChallengeWeek 20 – Anything Goes Colouring

Penny’s Paper Crafty ChallengePenny’s Challenge 432 – Anything Goes

Jo’s Scrap ShackFFC #284 – Anything Goes

2 Crafty Critter CraziesChallenge #27 – Anything Goes with “critter”

Crafty AnimalsChallenge #27 – Anything Goes

Until my next project, Happy Crafting!

Uncategorized

When Words Are Not Enough

I just got home from an 18-day all expense paid trip to Singapore. All because my beloved cousin wanted me to experience watching Phantom of the Opera live. It was an amazing trip spent with so many loved ones; my heart feels overwhelmed and my eyes fill up in gratitude. I have so many people to thank so I’m on a mission to make thank you cards for the people who took the time to make special moments and memories with me.

I just completed the first of many for a special person who’s like my adopted mother. We shared many laughs and she made some tough times more palatable.

For this card, I experimented with distress inks. I’ve had them sitting in my ink tin for a while, but I’ve never taken them out to play with them. I cut out a background image using my Brother Scan and Cut machine and used that as a stencil. I find that I’m pretty happy with the result considering it’s my first go at distressing!

Image: Mouse with Rose by Lee Holland Art
Background Cut File: Background Bundle 1 by Birds Cards

I would like to enter this card into the following challenges:

Outlawz Twisted ThursdayAnything Goes with Option of Using 3 Squares

Colour Crazy Craft ChallengeAnything Goes Challenge #18

Crafting With An AttitudeChallenge #51 – Anything Goes

2 Crafty Critter CraziesAnything Goes but Must Have a Critter #26

Colouring in Scrapland Anything Goes May Challenge with Optional Flowers

Crafty CalendarMay – Distress It

Alphabet ChallengeD is for Distressed Inks Paper

Jo’s Scrap ShackFun-Day Friday Challenge #282 – Anything Goes

Crafty Friends Challenge BlogAnything Goes Challenge #110

Crafter’s CastleAnything Goes Challenge #17 with Option to show what I colour with – Copic Markers

Outlawz Festive FridayAnything Goes

Fabrika FantasyChallenge # 30 – Animals

Friendship ChallengeChallenge #41 – Animals

Until my next project – Happy crafting!

Uncategorized

Superhero Mum

I’ve spent the last few days trying to sort out an idea in my head. I wanted to create a special Mothers’ Day card for a very special person. Nothing short of giving it my all would do. I had an idea for a superhero theme because I wanted the card to look fun and make her smile. Cos knowing me, the inside is gonna be soppy! ๐Ÿ™‚

I wanted to use my favourite superhero digital stamp because my auntie is totally badass and is a superhero in every way, but I was worried that it might unintentionally offend due to its sassy (and sexy!) nature. I thoroughly enjoyed colouring the image, but then when I was done, I stared at it blankly for hours. A few panic attacks later, I realized that she knows that I have my cheeky moments and will take it the way it’s meant to be – cheeky.

I still didn’t have any ideas for the layout of the card, so I went looking for sketches. I couldn’t find anything that appealed in this instance, so I finally decided on a comic book (ish) layout. Unfortunately, the brain fog was bad. Creating the digital elements took me hours because my brain just couldn’t remember simple processes that I had done a gazillion times before and I had to consult my trusted friend, Google!

Finally at about 4 o’clock in the morning, it all came together and here it is!

Image: Super Spandex by Illustrations by T
Papers: Superhero Digital Paper Pack by LaLavanderiaDigital

I’d like to enter this card into the following challenges:

Cardz TVAnything Goes Challenge #87

Colour Crazy Craft ChallengeWeek 15 – Anything Goes

Festive Friday Challenge#FF0032 – Mother’s Day And/Or Pink

Outlawz Festive Friday ChallengeApr 19 – May 2

Scrapper’s DelightApril 2019 – Anything Goes

Penny’s Paper-Crafty Challenge#426 – Anything Goes

Outlawz Twisted ThursdayAnything Goes / Fleur de Lis – Apr 11 – Apr 24

Crafting With An Attitude#50 – Anything Goes

A Place to StartMid-Month Anything Goes with Optional Twist

Colouring in ScraplandApril 2019 – Anything Goes

Until my next project! ๐Ÿ™‚

Uncategorized

Baby in a Blue Dress

Sometimes things just work out and an idea in my head actually translates onto my project. That is what happened with my latest project which I named Baby in a Blue Dress.

Baby in a Blue Dress
Image: Big Eye Girl Sorry Sally Image No. 205 by Oddball Art Co
Papers: Celebration in Pink Champagne by AMB Illustrations

For this card, I used Sketch Saturday’s Sketch #245.

I would like to enter this project into these challenges:

Outlawz Progressive ChallengeApril 2019

Di’s Digi Designs ChallengeMake It Girly

Digi Choosday Craft ChallengeAnything Goes Challenge

As You Like It ChallengeFavourite Colouring Medium (Copic markers because they are easy to blend seamlessly and faster to colour than coloured pencils)

Oddball ChallengeApril Oddball Challenge

Outlawz Saturday Paper A La ModeMarch 30 to April 12

Outlawz Festive FridayApril 5 – April 18 – Birthday

It’s a great feeling when everything comes together.

Till my next project! ๐Ÿ™‚

Uncategorized

When the Mojo Takes a Hiatus

Misha Collins recently posted that it was the first day of his last hiatus from filming Supernatural – my absolute favourite show. However, it seems that my creative mojo has decided that he needed some company!

I think most people who create encounter dry spells in some form or other (I truly envy you if you don’t!) I’ve always been an extremist, being at either one end of a spectrum or the other, and rarely in between (although I am trying to learn to step into the grey). My creativity – sadly – isn’t an exception. Some nights my brain is bombarded with a myriad of ideas, like an overflowing river – so fast that my hand can’t keep up with it as I scramble to grab my pencil and paper and scribble furiously, trying my best to write my ideas down in a manner that will still make sense come morning.

Then there are times like now – when ideas are like the smattering of trees in an otherwise dry and barren region of the Australian outback in the height of summer. I have discovered that very often, these times usually coincide with having a lot on at the time. My theory is that my left brain goes into overdrive (think Turbo after NOS) and my poor right brain is left in the dust (Turbo before NOS). However, extended periods spent not creating and crafting puts me on edge and makes me really restless, some might even say irritable *coughs and splutters*. It’s at times like these that I look for some NOS for poor Turbo stuck at the starting line, and I find it in the form of card sketches.

Card sketches are like blueprints for cardmaking. It shows the layout of the card and where elements such as card, mats (if any), patterned paper, ribbon and borders go. I find that breaking down a card to its bare bones helps me a lot because I only make one decision at a time and then further build on the selected option. Some days I still struggle with this thanks to the brain fog that most of us receive as a free gift with compliments from fibromyalgia (we’d absolutely love to return it if we could), so breaking decisions to chihuahua-sized bite pieces such as, “square card or rectangle card?”, “embossed or not?”, “this paper or that?” helps me tremendously as I feel like I am moving forward, even if it’s only by a fraction of an inch.

There are many blogs already devoted to card sketches. A simple search in a search engine or on Pinterest would bring up a host of possibilities, but these are the ones I keep coming back to. I’ll try to remember amidst the brain fog to update this list if I find more that I use.

The past week has been really hectic in my head, and although I got a lot of colouring done and created toppers for cards, my list of cards to make for family for Easter, Mother’s Day and other occasions wasn’t getting any shorter. I flipped through some sketches and found one that spoke to me at the time. And what do you know? I’ve struck my auntie’s birthday card off my list and this is the end result.

Birthday Bear
Bear Digi Stamp – Teddy Bear Picking Flowers by The Paper Shelter, coloured with Copics
Patterned Papers – Echo Park Springtime Paper/Elements Pack 1 and Pack 2

I’d like to enter this project for the following challenges:

Use Your Stuff Challenge #353 – Fuzzy Wuzzy

Papercraft Challenges #34 – Polka Dots

Papercraft Challenge #17 – Anything Goes

Outlawz Saturday Paper A La Mode (Mar 30 – Apr 12) – Non-rectangle Card

That old adage – “Fake it till you make it”? Sometimes that is exactly what I do. Guess some old wives were wise after all, and no, I didn’t mean me! ๐Ÿ™‚

Till my next project!

Uncategorized

How I Find Myself the Creator of a Blog

I’ve been colouring and cardmaking for a while now. Creating allows me to be in my happy place. I deal with a whole host of health issues – both physical and mental – and crafting gives me the endorphins I am obviously lacking when I’m down or overwhelmed.

I don’t claim to be an expert, quite the opposite, in fact! I see so many cards on Pinterest, other blogs and challenge sites that it can seem pretty daunting. It seems as though my cards are made by a kid in comparison to countless others I’ve seen. And I’m a very harsh critic of my work. However, I have to acknowledge that I have improved by leaps and bounds from when I first started cardmaking and colouring as an adult. And a very wise person consistently reminds me that the fun of creating is in the journey – the process – and not the destination – the finished product.

In being mindful that every person is on their own creative endeavour and not to compare finished outcomes, I have started to enter online challenges a lot more. The next logical step seemed to be starting a blog, not only to help me keep track of the challenges I’ve entered my cards into, but to hopefully also be able to provide some encouragement to others who are just starting out on their creative road trip.

I look forward to sharing my work with you – the good, the bad and the ugly!